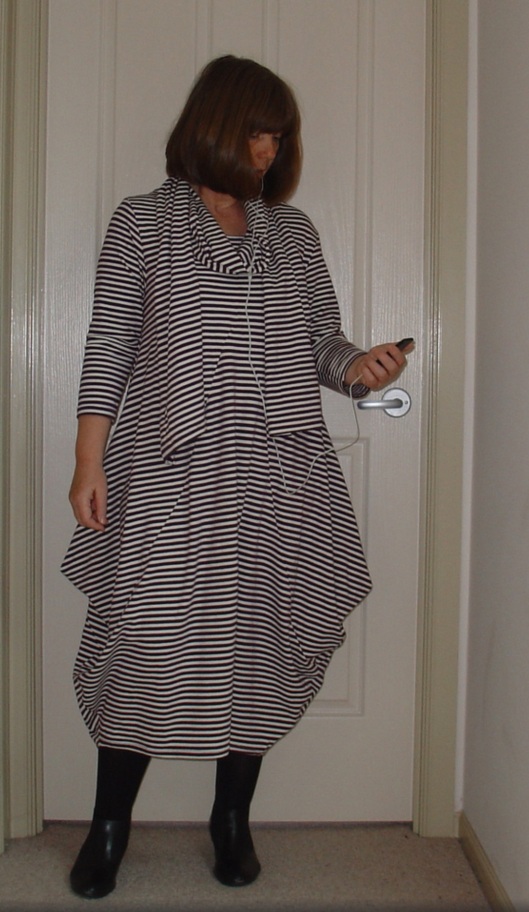
Every now and then you come across a pattern that is just perfect. For me perfection includes a heavy dose of quirkiness, or weirdness, depending on your point of view. But I assume that you are a kindred spirit if you are reading my blog. So let me introduce the Pointy Dress. I came across the original pattern in an Italian sewing magazine called La Mia Boutique. I loved a lot of their patterns, but since that one fabulous issue I bought their style direction has changed to a more mainstream aesthetic. I kept buying more issues when I could get my hands on them, but always ended up disappointed. Pity, but I bet they sell more magazines by catering to mainstream tastes. Anyway, here are the pics that captured my heart: 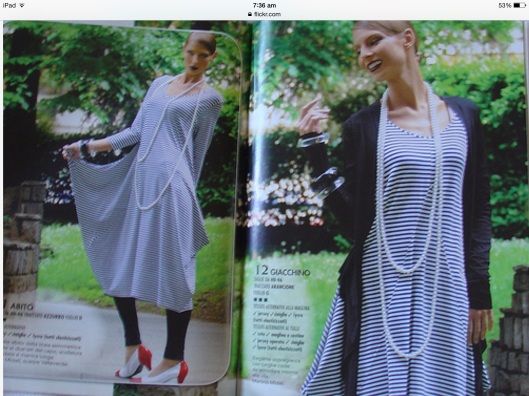
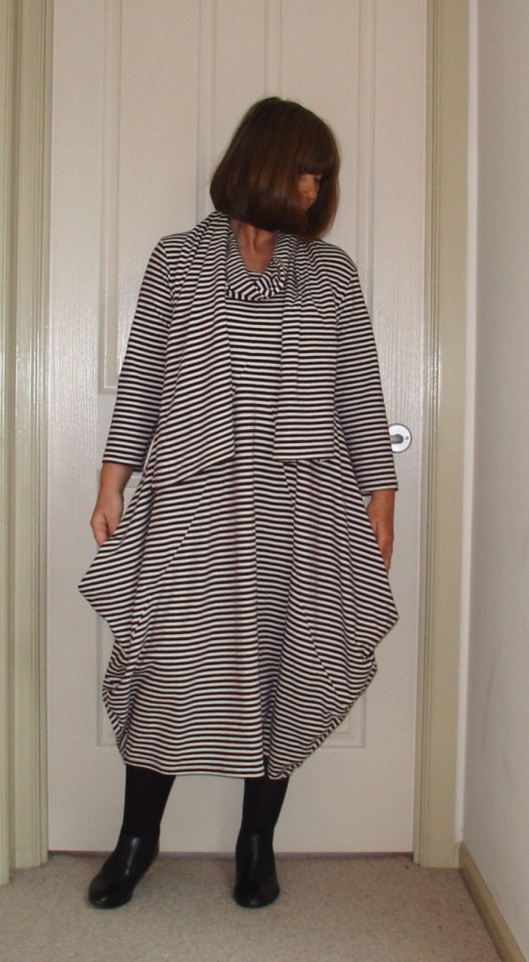
As it happened I had a striped interlock in my stash and so of course I traced out the pattern and made my own version. I reviewed the pattern here.
And below is the shape of the garment. You tuck in the pointy bits on the skirt, which makes a sort of little pocket, although I don’t think it is very usable as such, and provided your fabric is reasonably drapey the skirt will collapse into soft folds. You can also let the points stick out, but I prefer them tucked in. 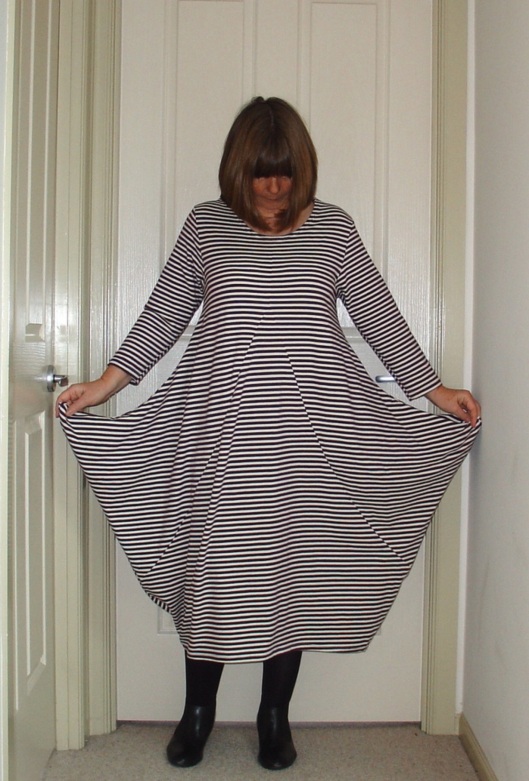
However, the pattern was unnecessarily complicated. It had a two-part yoke with a seam at centre front and centre back, then three parts for the skirt, with diagonal seams going from the centre of the yoke to the sides. If you have a good look at the pic just above this one you can see a seam going from the bottom of the left scarf end to the left side seam. This makes it difficult to match stripes, and anyway, why not cut the back and front of the dress as single pieces? I do like simplicity.
I also didn’t like the dropped shoulders and the sleeves are unnecessarily wide at the top where they join the bodice. I always feel that if you have a lot of volume in a garment, as is the case with the skirt of this dress, the fit in the bust, shoulders and sleeves should be quite close to compensate.
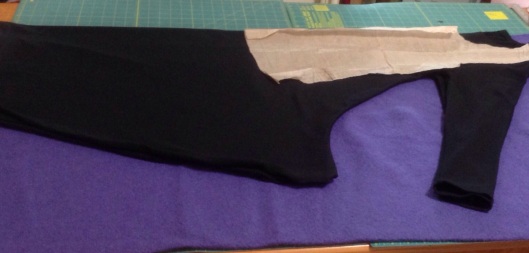
So the next time I made this dress I used my TNT t-shirt pattern, Burda 3197, for the bodice part and sleeves, then frankenpatterned with the original La Mia Boutique pattern from below the bust downwards. I also joined up all the skirt pieces of the LMB pattern to make one pattern piece for the whole front. With this sort of garment it is not necessary to be too precise for the skirt part. 10cm more or less are neither here nor there. The back pattern piece is the same as the front, just with a higher neckline. I have also overlaid the dress pattern with the t-shirt pattern so you can see how it is frankenpatterned.
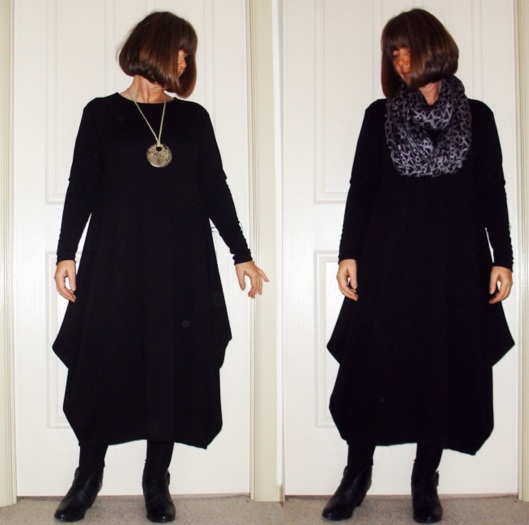
With the sleeves from the t-shirt the dress looks like this in grey ponte. 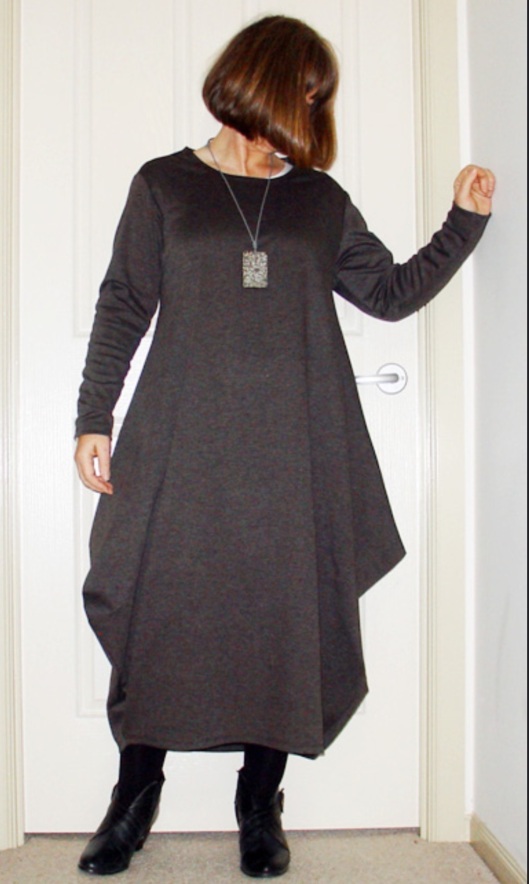
And like below you can see it in black ponte, with or without scarf. I wore this with a string of pearls to a family funeral recently and it impressed one of the rellies so much that she got all keen to take up sewing again. The more the merrier, I say.
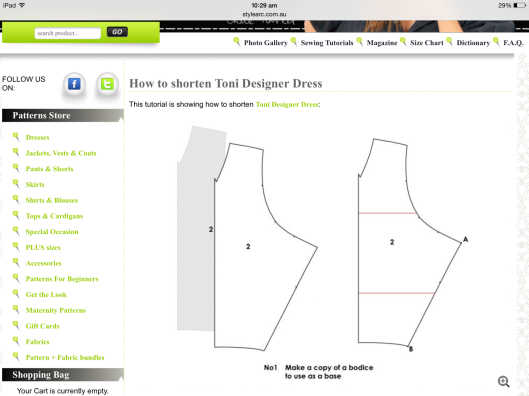
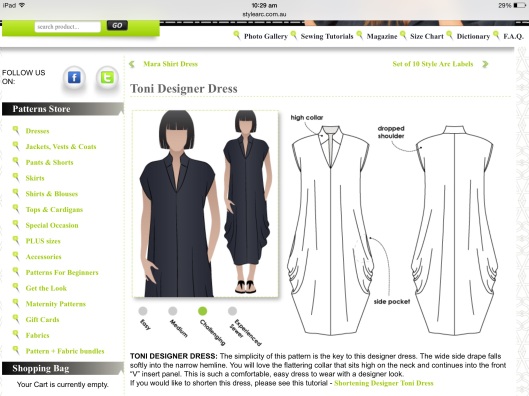
If you like the style but do not want to draft your own pattern, the StyleArc Toni dress is something very similar. It has a CF and CB seam and a v-neck with collar, plus cut-on cap sleeves. The latter may suit you better than long sleeves if you live in the northern hemisphere where it is of course summer at the moment. You can also leave the collar off and just have a v-neck, or do whatever you like. We are sewists after all, we can please ourselves.
You can see the pattern pieces of the Toni more clearly below.
StyleArc have an Etsy store for downloads as well if you are not in Australia and don’t want to wait for the paper pattern to arrive in the mail. I am not affiliated, of course, just happy to point those interested in the right direction.

![IMG_0445[1]](https://theinsouciantstitcher.files.wordpress.com/2015/07/img_04451.jpg?w=529&h=395)
This is an amazing dress on you! I think there’s a Sandra Betzina Vogue that is similar too but each dress looks wonderful on you!
LikeLike
Forgot to mention, Style Arc has a sale right now…20% off with code XMASJULY.
LikeLike
Looks very interesting! Which issue of La Mia Boutique is it in?
LikeLike
7-2009, so a few years ago. My son lived in Europe at that time and bought me a few more issues later, but as I said, it was only that one that had such adventurous patterns. The others were all pretty pedestrian, at least in comparison.
LikeLike
Thanks, I may have that issue. I stopped buying La Mia Boutique several years ago for the same reason. They used to have more interesting patterns but seemed to become very conventional.
LikeLike
I really love these two dresses. Both the fun stripey version and the sophisticated black. Very elegant. Nice work.
LikeLike
Totally Fabulous, I have that Stylearc pattern but the possibility of ever getting time to make it is as likely as winning Lotto, so it was a pleasure to see it on you and fantasise about the delights of having it myself…Never heard of Mia patterns so thats a new one to look into..
LikeLike
Your perfect dress pattern! Love that it’s fitted to the bust, and then drapes. I can see you’ll get a lot of wear out of these.
LikeLike
I love the dress. I really appreciate the details on how you made the quick one. I ventured to make a pointy t-shirt pretty much the same way.
LikeLike
I have Just got home from av big dinner event where I wore the Toni dress made up in a heaven black wool Jersey with sleeves whic I drafted to keep my arms warm . The dress is black and I wore it with bright red shoes . Gift pleasant compliments so can recommend pointy style dresses as something versatile in the wardrobe . I love your stripes on with the round neck , I can see that with my red shoes 😄
LikeLike
I can just picture those red shoes! Sounds great with the black dress. And the wool must be very luxe.
LikeLike
Thanks everyone. I appreciate the kind words.
LikeLike
Always enjoy your posts as your creativity is so inspiring. These dresses look fabulous and totally agree with you and everyone else that fit in shoulder and upper torso area make all the difference to these styles.
LikeLike
I just love your dresses and thank you so much for “pointing ” me in the right direction for a similar pattern. No pun intended it came out before I realised. 🙂 Lynne Haywood
Sent from my iPad
>
LikeLike
Hope the Toni works for you. I am contemplating buying it myself, to have another angle at this interesting style. Some times subtle variations can make quite a difference.
LikeLike
LOVE!! And potentially SO simple – double win!!
LikeLike
I love your Dresses, every Wednsday i`m looking foreward to your Blog!!!
LikeLike
Hallo Renate,
Schön dass du wieder mitmachst, und tolles Kleid!
Lg Sybille
LikeLike
Danke Sybille. Ich hoffe ein bisschen deutsch-australischer Austausch (cross pollination) ist fuer beide nuetzlich. Ich werde versuchen, oft australische Schnitte vorzustellen. Ich finde deine website toll, weil ich mehr europaeische Schnitte kennenlerne.
LikeLike
Love it! Don’t know how I managed to miss this post, so I am commenting now! I’m thinking round neck, or maybe a sewn on cowl. I’ll probably get the Style Arc version and play around with that! Thanks for the link!
LikeLike
Hi Twotoast, I think a cowl would be lovely. I posted a cream outfit with a shoulder cowl on artisan square a while ago. The dress had the same pointy shape. So I ordered some cream ponte to make something similar, but it won’t happen now until next winter. When I get back from my trip, spring will be full on.
LikeLike
I love what you did with the combination of patterns. The black pointy dress is luxe! Would you consider selling your pattern for the dress. Thanks for your consideration. Best!
LikeLike
Thanks Carol, it is very kind of you to say that. But sewing is a hobby for me, and I am not a pattern maker, just a pattern adulterater. 🙂 That is why I put a link at the end of my post to a very similar pattern from StyleArc. The link is to the downloadable pattern on their Etsy site, but they also sell the paper version on their regular website, if you prefer. I hope you enjoy this dress as much as I do.
LikeLike
Pingback: In Stripes from Head to Toe | The Insouciant Stitcher
Excuse my late comment as I am just now discovering your blog, but if you haven’t already sewn it I think the Kielo wrap dress by Named patterns made without the waist ties would be another similar one 🙂
LikeLike
Yes, absolutely. The pattern is very similar, except I think the ‘points’ are a bit higher, more somewhere between waist and high hip level.
I must say that I find Named patterns a bit expensive, so prefer the StyleArc version. Modifying is easy enough for an experienced sewist. A beginner would probably be better off paying the extra in order to avoid this.
LikeLike
You are correct about the height! It gives a different but still flattering look. I’m an intermediate sewist but have no pattern hacking experience so I bought the Kielo 🙂 it has some nice bust darts too which give just enough shaping for me
LikeLike